Showing posts with label Blog. Show all posts
"Develop a passion for learning. If you do, you will never cease to grow." - Anthony J.D'Angelo

Hello Blogger friends!! Hope you have great week.


If you want to promote your blog, the first step is your presentation and photos. Photos are awesome stuff which you deliver your messages better than words. Next step we need to promote on social media. That's the best option if you already decided. So today we going to meet the both in same. Yes, in your blog images try to connect the social media. Now i am going to explain the steps how to hover the pinit button on the blog images. Its really simple with the pinterest. Just follow the steps and let me know your comments. All the best Blogger friends and have fun.

Step 1 - Get the Code

To get your own button code, go to Pinterest Widget Builder. Select the "Button Type" option is set to "Image Hover", then choose your favorite button style.


Image Hover Option

You'll get a choice of Round or large buttons. You can preview each button style to choose the right one for your blog. Once you have chosen your button style, copy the generated code in the below grey box. Refer the below image.


Pinterest hover generated code

Step 2 -  Paste the code

For paste the code, we have two options here.
  • Option 1:
    • Login to Blogger and navigate to Layout. Click Add a Gadget and select HTML/JavaScript. Paste the copied code and save arrangement. I suggest to place that code in footer.
Blogger HTML/JS page
  • Option 2:
    • Login to Blogger and navigate to Themes > Edit HTML. Paste the code just above the closing </body> tag of each page where you want the button to show up on your site.
Blogger Edit HTML page


The Final Output of you blog
Final Outcome of your Blog
“Let the improvement of yourself keep you so busy that you have no time to criticize others.” - Roy T. Bennett, The Light in the Heart 


After seeing this topic, the first question on you mind as why i need to confirm website or blog on Pinterest profile. Here i'll explain the main purpose for the same. Mainly you get the two good news or win-win situation due to this website confirmation.
  •  Yay!!! You get access to Pinterest analytics.
  •  Pinterest displays your profile picture on Pins that people saved from your website. This increases your visibility and credibility. 
Got excited after hear this news!! Enjoy friends and start with the steps.
 
Step 1 - Login to your Pinterest account.

Step 2 - Click your profile picture button at the top. Click on Settings.

Step 3 - Scroll down and at the profile you can see the Website text box, refer the below screenshot.  Enter your website address or Blog URL and click the “Confirm website” button.
Pinterest Settings

 Step 4 - Copy the code that appears in the box, its metatag.

Pinterest Megatag code generated

Step 5 - Login to your Blogger Dashboard and navigate to Theme > Edit HTML.

Step 6 - Search <head> tag in HTML code.

Step 7 - Create a new line below the <head> line. Now paste in the code you copied from Pinterest. Make sure you add the Pinterest code before the <body> section of your template.

Blogger - HTML screen
Step 8 - Click the Save Theme button.

Step 9 - Go back to your browser window and click Finish button. Pinterest will automatically check your blog. Now you see Site confirmed next to your website address. Click the Save Settings button and you’re all set :-)

Pinterest Website/Blog confirmation page


Notes

  • Once confirmed your blog on your Pinterest account, you can remove the meta tag from your HTML code.
  • You have only one website on your Pinterest profile. If you have multiple Pinterest accounts, you can remove the website at anytime from one Pinterest account and then confirm it on your other Pinterest account.
 Tell me and I forget, teach me and I may remember, involve me and I learn - Benjamin Franklin

Halo Blogger friends!! Hope you had great week.

If you want to promote your blog, the first step is your presentation and photos. Photos are awesome stuff which you deliver your messages better than words. Next step we need to promote on social media. That's the best option if you already decided. So today we going to meet the both in same. Yes, in your blog images try to connect the social media. Now i am going to explain the steps how to hover the pinit button on the blog images. Its really simple with the below 4 steps. Just follow the steps and let me know your comments. All the best Blogger friends and have fun.


Step 1 - Edit HTML
Navigate to Blogger > Theme > Edit HTML as shown in the below screenshot.


Step 2 - Copy the below provided code.

<div class="”code”">
![CDATA[ var custom_pinit_button = "https://blogger.googleusercontent.com/img/b/R29vZ2xl/AVvXsEhRjAn_YZX1dUBp0VKUmDc9ZzNINO59x1htKOf7kKWVthBUU_k3C9v1frH1oc4Gp5xAEegB1gw3za3iYkRmw6RbfIOxTXY8JIysOErWKmsPsyrU_Wx5aO2J3duaPf-KS16wDFcGjiivQLQV/s1600/pinit-button.png"; var pinit_button_position = "center"; var pinit_button_before = ""; var pinit_button_after = ""; //]]&gt;</b></div>
</div>
</div>
<script src="https://ajax.googleapis.com/ajax/libs/jquery/1.8.2/jquery.min.js" type="text/javascript"></script>
<script id="pinit-img-button" type="text/javascript">
//<![CDATA[
eval(function(p,a,c,k,e,r){e=function(c){return(c<a?'':e(parseInt(c/a)))+((c=c%a)>35?String.fromCharCode(c+29):c.toString(36))};if(!''.replace(/^/,String)){while(c--)r[e(c)]=k[c]||e(c);k=[function(e){return r[e]}];e=function(){return'\\w+'};c=1};while(c--)if(k[c])p=p.replace(new RegExp('\\b'+e(c)+'\\b','g'),k[c]);return p}('1i(1j).1k(r($){$(\'M\').1l(\'<6 p="4:D;" N="A" O="\'+13+\'" >\');$(\'#7-6-P\').1m();3 l;3 m;3 n;$(\'.A\').1n(r(){m=$(\'.A\').E(F);n=$(\'.A\').G(F);$(\'.A\').1o()});3 o=$(\'#7-6-P\').1p().1q("1r.1s.14");o!=-1&&15();r 15(){$(\'.s-16 6,.H-M 6,.s-17 6\').1t(\'.18,.18 6\').1u(r(){$(\'.7-4\').t("4","D");19(l);3 a=$(q);3 b=1a(a.t("Q-u"));3 c=1a(a.t("Q-v"));3 d;3 e;1v(1w){B\'1x\':d=a.9().u+a.G(F)/2-n/2;e=a.9().v+a.E(F)/2-m/2;C;B\'1y\':d=a.9().u+b+5;e=a.9().v+c+a.E()-m-5;C;B\'1z\':d=a.9().u+b+5;e=a.9().v+c+5;C;B\'1A\':d=a.9().u+b+a.G()-n-5;e=a.9().v+c+a.E()-m-5;C;B\'1B\':d=a.9().u+b+a.G()-n-5;e=a.9().v+c+5;C}3 f=a.1C(\'O\');3 g=a.1D(\'.H,.1E,.s\').R(\'.H-S,.s-S,.s-1F\');3 h=g.1G();w(T U===\'V\'){U=\'\'}w(T W===\'V\'){W=\'\'}w(g.R(\'a\').1H){X=g.R(\'a\').I(\'Y\').1b(/\\#.+\\b/1c,"")}Z{X=$(1I).I(\'Y\').1b(/\\#.+\\b/1c,"")}3 i=\'<1d N="7-4" p="1e:x;9: 1J;z-1K: 1L;" ><a Y="1M://1N.14/1O/1P/P/?1Q=\'+X+\'&1R=\'+f+\'&1S=\'+U+h+W+\'" p="1e:1T;1U:x;" 1V="1W"><6 N="1X" p="-1Y-J-K:x;-1Z-J-K:x;-o-J-K:x;J-K:x;10: 0.8;20:21;Q: 0;22: 0;23:0;" O="\'+13+\'" S="24 1f 25" ></a></1d>\';3 j=a.11().26(\'a\')?a.11():a;w(!j.y().27(\'7-4\')){j.28(i);w(T l===\'V\'){j.y(\'.7-4\').I("1g","q.p.10=1;q.p.4=\'12\'")}Z{j.y(\'.7-4\').I("1g","q.p.10=1;q.p.4=\'12\';19(29)")}}3 k=j.y(".7-4");k.t({"u":d,"v":e});k.t("4","12");k.L().1h(2a,1.0,r(){$(q).2b()})});$(\'.s-16 6,.H-M 6,.s-17 6\').1f(\'2c\',r(){w($.2d.2e){3 a=$(q).y(\'.7-4\');3 b=$(q).11(\'a\').y(\'.7-4\');l=2f(r(){a.L().t("4","D");b.L().t("4","D")},2g)}Z{$(\'.7-4\').L().1h(0,0.0)}})}});',62,141,'|||var|visibility||img|pinit||position||||||||||||||||style|this|function|entry|css|top|left|if|none|next||loadpinitbutton|case|break|hidden|outerWidth|true|outerHeight|post|attr|box|shadow|stop|body|class|src|button|margin|find|title|typeof|pinit_button_before|undefined|pinit_button_after|pinitURL|href|else|opacity|parent|visible|custom_pinit_button|com|hoverCheck|content|summary|nopin|clearTimeout|parseInt|replace|gi|div|display|on|onmouseover|fadeTo|jQuery|document|ready|append|hide|load|remove|html|indexOf|blogspot|not|mouseenter|switch|pinit_button_position|center|topright|topleft|bottomright|bottomleft|prop|closest|hentry|header|text|length|location|absolute|index|9999|http|pinterest|pin|create|url|media|description|block|outline|target|_blank|pinimg|moz|webkit|background|transparent|padding|border|Pin|Pinterest|is|hasClass|after|pinitOnHover|300|show|mouseleave|browser|msie|setTimeout|3000'.split('|'),0,{}))
//]]>

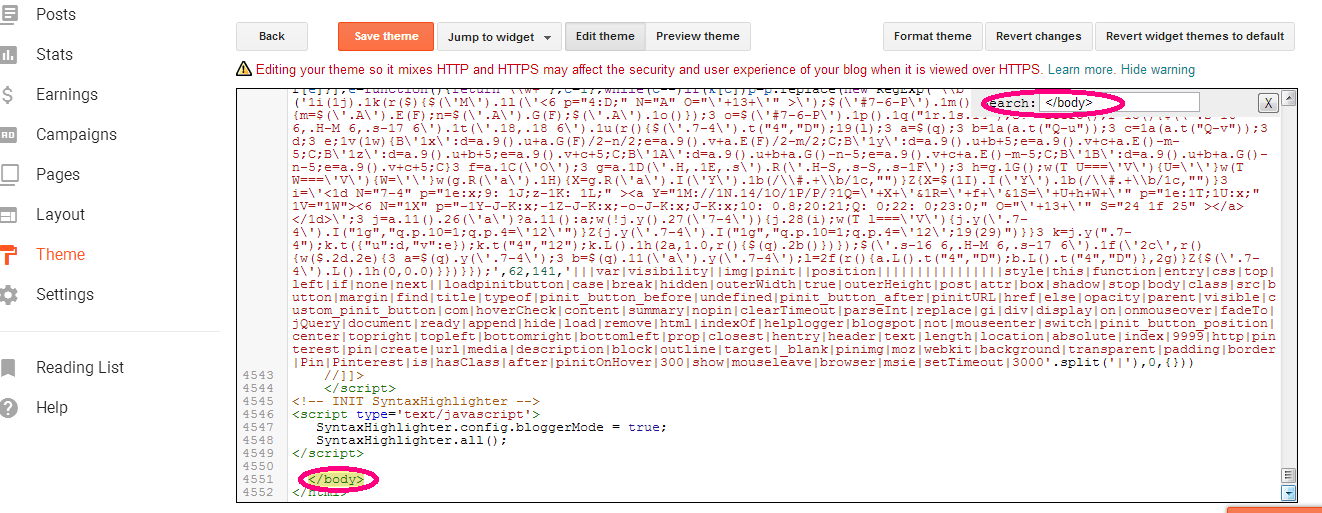
Step 3 - Paste the provided code in the Edit HTML above tag. Click on Save Theme.


Step 4 - Preview the post and Just see the below screenshot for your reference.


Bonus Note:

Step 1 - Search the below line in the provided code.
<pre class="brush:css">var pinit_button_position = "center";</pre>

Step 2 – Now replace the "center" with any of the below list.

<div class="”code”">
<pre class="brush:css">topleft
topright
bottomleft
bottomright</pre>
<pre class="brush:css"></pre>
</div>
That’s it!!! Have fun and enjoy with the new feature in your blog.
Live as if you were to die tomorrow. Learn as if you were to live forever. - Mahatma Gandhi

Never stop your learning. I learnt something new in coding, want to share with you. Here we go.


Syntax Highlighter is a fully functional self-contained code syntax highlighter developed in JavaScript. This helps to display the organized numbered style. Most of the bloggers use HTML / CSS / JavaScript codes, here i used the CSS. In Blogger there is no special syntax so we can do Syntax highlighter by inserting few lines of codes in our template. Just follow the below steps and enjoy!!

Step 1 - Edit HTML
Navigate to Blogger > Theme > Edit HTML as shown in the below screenshot.


Step 2 - Copy the below provided code.


Step 3 - Paste the provided code in the Edit HTML above  </head> tag. Click on Save Theme.


Step 4 - Open the post editor and open HTML mode. In HTML section, enclose your code with the below tags.

<pre class="brush:css">
your code here
</pre>


Step 5 - Save and preview the post. Just see the below screenshot for your reference.


A good teacher can inspire hope, ignite the imagination, and instill a love of learning. - Brad Henry

Bloggers challenging part is need to get more readers to your blog. You want to attract more readers as much as possible. The effective way to achieve that goal is to link your blog with social network. You can automatically link the social icons to your blog. Today i come up with simple coding in HTML to add social icons on your Blogger Header. Hope this 4 steps will help you to save your time to add social icons on your blogger.


Step 1 - Edit HTML

Navigate to Blogger > Theme > Edit HTML as shown in the below screenshot.


Step 2 -Search </b:skin>

In Edit HTML, search </b:skin> using Ctrl+F, then paste the below code above </b:skin> tag.

#social-icons {
margin-bottom:-30px;
height:50px;
width:100%;
clear:both;
z-index: 2;
position: relative;
}

.social-media-icons {
display:table
}

.social-media-icons ul {
text-align:right;
padding:5px 5px 0 0
list-style-image:none;
list-style-position:outside;
list-style-type:none;
}

.social-media-icons ul {
margin-bottom:0;
padding:0;
float:right;
}

.social-media-icons li.media_icon {
margin-left:6px;
padding-left:0 !important;
background:none !important;
display:inline;
float:left;
}

.social-media-icons li:hover {
-moz-transform: rotate(360deg);
-webkit-transform: rotate(360deg);
-o-transform: rotate(360deg);
transform: rotate(-360deg);
-moz-transition: all 0.5s ease-in-out;
-webkit-transition: all 0.5s ease-in-out;
-o-transition: all 0.5s ease-in-out;
-ms-transition: all 0.5s ease-in-out;
transition: all 0.5s ease-in-out;
}

Step 3 - Search <b:section class='header'>

In Edit HTML, search <b:section class='header'> using Ctrl+F, then paste the below code above <b:section class='header'> tag.


Step 4 - Save Theme and preview

 Refer the below link for the themed social icon images
http://www.carrieloves.com/2012/12/free-social-media-icons-updated


Without HTML knowledge you can add the social media icons, click here.
Yes, you read correct. Simple 9 steps to add social icons to you blogger with NO HTML coding knowledge. Really its simple and time effective steps.

https://drive.google.com/open?id=0B43wwPnUEbHuMEF6S3YtZU9DYUk

I tried a lot of different ideas to add the social media icons to my blog. Even I worked in IT but I never get the chance to work on coding part so its really hard for the people like me to add features in our blog. Finally I worked out with this 9 steps to add social icons to your blog, trust me without HTML / coding skills you can easily add the social icons.
Here are the steps.

Step 1 – New post creation
  Step 2 – Go to HTML
Step 3 – Refer the below link for the themed social icon images  


Step 4 – While uploading the below popup is displayed 


Step 5 – Code generated 


Step 6 – Go back to compose and select the image, click on Link. 


Step 7 – Copy the generated code. Ensure the height and width as per your blog page 


Step 8 – Go to Layout > HTML/Javascript Gadget > Edit 


Step 9 – Thats it... U made it!!! 


P.S - The link i shared in my page is my personal opinion :)